Back to Articles on Accessories / Articles sur les
Accessoires.
Airwave / Ram
Race
Review by Jérôme Daoust. Created 2004/5/14, revised 2009/3/24
1. Observations
· Seating
o Slipping back into the harness
o Comfort
o Footrest
2. Performance
3. Wish List
4. Conclusion
My thanks to :
· Mitch McAleer of Wills Wing, for supplying the harness for testing. Late in a day's work, Mitch spent time with me to install one of his reserves, create lines for the accelerator system, sharing knowledge gathered with another customer, and setting initial adjustments.
· Richard Smith, an early buyer, for going out of his way to make his harness available for inspection and sharing his experiences. Richard is always one step ahead of me with new stuff.
· The guys at Airwave for exchanging information with me : Bruce Goldsmith, Markus Villinger.
· All others who helped develop this product : Adrian Thomas, Martin Gostner.
Intent of this review : Focus on the ease-of-use and comfort, not on verifying the performance enhancement claim.
Airtime.
3 hours of thermalling at Marshall, with 2 of them in strong mid-day conditions. I made 2 early top landings to work on adjustments.
I often had both hands off the brake toggles and into the harness for adjustments, thinking "I should not be doing this, but I want to get it right". Good thing it was not a weekend day, and I had ample airspace.
General construction.
It seemed to be good. Nice finish, robust looking parts. Zippers operated well.
Documentation.
No manual available at this time. I was told there is a German version manual in existence.
In the Wish List, I recommended having a single sheet with a few guidelines until the manual is available.
Still no manual or information sheet delivered with the harness I purchased and receive 2004/12/21.
Reserve
parachute setup.
Not feeling knowledgeable enough to do reserve parachute installations myself,
I let someone else do this for me.
I will emphasize : Do a reserve deployment test.
· Another customer reported the need for a few test before getting a working setup. He could not extract his reserve on the first attempt. Someone else demonstrated that it was still possible by applying more force. The issue was that the strap from the handle was attached to the closest edge of the reserve diaper and this provided no rotation moment to the reserve bundle to lift itself out of the outer container because of the cover's long semi-rigid tab, which inserts itself towards the rear close the assembly. This tab would just block the sideways motion. The fix was to relocate the reserve handle strap to the center of the diaper attachment point, creating a rotation moment, which can pop the cover tab. I hope this will be covered in the manual.
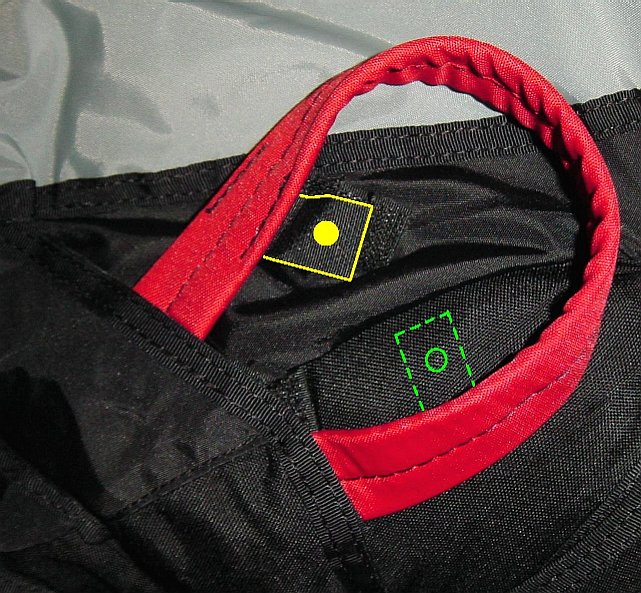
|
|
|
Click on picture for larger size. Reserve handle. There is an inconsistency on the location of the male Velcro on the handle as another unit had it sewn as shown by the dotted green contour, allowing the handle to be relocated further back. Which is correct ? |
With the new harness (received 2004/12/21), I had my reserve (QS 440) installed today (2004/12/22) by Betty Pfeiffer of High Energy Sports who is an expert in the field of reserve parachutes. Some observations:
· It would have been useful to have installation instructions. Don't forget to tuck the asymmetric tab on the handle side (going over the handle straps).
· The reserve was put in a diaper bag, with the attachment to the handle placed on the outward side (not against the seat bottom).
· We added Velcro to both sides at the base of the handle to help secure it, although this is not a necessity.
· The straps to the release pins have zero loose. An extra 2 cm would be good. Same for the strap to the container.
· Reserve model specific… The reserve bridle attached to the shoulder straps were cut in the single layer, 1 cm above the double layer end, and sealed with heat. Structural strength should not be affected as the cut is far from the hang loop. Having left the bridle would have added unnecessary bult to the 4 bridles coming from the reserve, which were long enough to connect to the shoulder loops.
· My reserve (QS 440) was a tight fit. But strong fingers made it happen.
· The container bottom flap corners have pockets, so you can push them in far with a round flat pushing tool. Nice !
· Once all tabs are tucked, general fit and appearance looks good.
· Slow deployment test. This is where I was most impressed, as I expected the tight fitting reserve and seemingly complicated flaps and tabs to create lots of friction and induce a great pulling force. Handle pull was relatively easy and smooth, producing a predictable extraction behavior. Bravo to the designer of the container.
|
|
|
|
Click on picture for larger size. Front fairing without cockpit. |
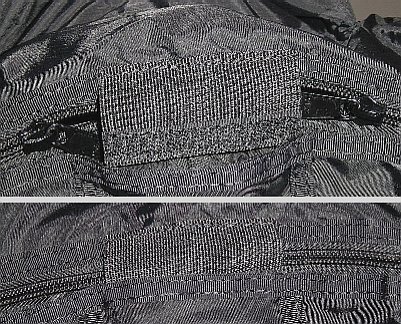
Click on picture for larger size. Left neoprene fairing slit was overlapped incorrectly. Verified by inspecting another harness. This is only a cosmetic issue, as in flight, air did not enter through the slit and passage of the hand remained easy. Update, 2004/12/21: The new harness I received, does not have this problem. |
· The front zipper locks well, even when under tension from cockpit is inserted behind it.
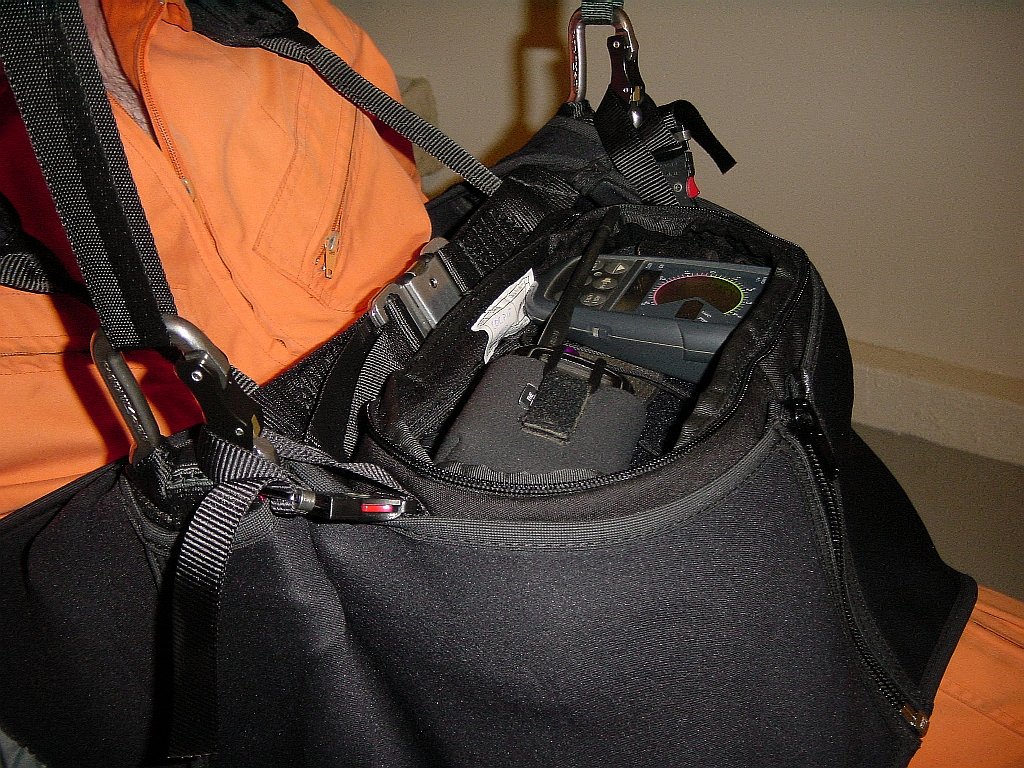
Instrument panel. Because of the front fairing, it would not be convenient to use a leg-mount vario, so one should move to another support for the instruments. In this case I chose a Sup'Air / Cockpit-Ballast model. For the details on instrument setup, see Electronics Component. Connection options, flight-tested:
|
9/10 |
In front of fairing. + Attached to carabiners. |
|
· Good: No added tension to the neoprene fairing and seems. · Good: Better control of deck angle. Little need for resetting in flight. · Bad: Maybe less aerodynamic. · Good: Easy access to storage volume in lower cockpit |
|
6/10 |
Behind fairing. + Attached to carabiners. |
Click on picture for larger size. |
· Bad: Stretches neoprene fairing and seems. · Bad: Deck angle need to be reset in flight following slip inside fairing. · Good: Aerodynamic? · Neutral: Storage volume in lower cockpit can still be accessed in flight through the fairing's side slit. |
|
3/10 |
Behind fairing. + Attached to tow loops. |
I had used steel quick-links to facilitate the passage of the cockpit loops. |
· Bad: Stretches neoprene fairing and seems. · Bad: Deck angle need to be reset in flight following slip inside fairing. · Good: Aerodynamic? · Neutral: Storage volume in lower cockpit can still be accessed in flight through the fairing's side slit. · Bad: Rear of flight deck can get under the chest strap buckle which pressed down on my Competino's Esc button (not good) toggling the display from normal to map. Potential scratching? |
· In flight, there is some friction of the lines inside the harness during acceleration. I am used to almost no friction with a Sup'Air Evo Top so I could notice a difference. But with the new harness I received 2004/12/21, 3 hours of flying indicates that friction was downgraded to a minor issue. Maybe the better pulleys and re-aligned grommet and rear pulley helped enough.
· After maximum travel, there remained another 6" of possible travel, before the Brummel hooks would reach the first grommet. Lots of range of motion there.
· In the harness I received 2004/12/21, the pulleys seem better: Slightly larger (from memory comparison of the first harness I tested) and low friction.
· In contrast to my regular harness (Sup'Air Evo Top), my legs got more upright when fully accelerated. This can be compensated by pressing back on the risers or reclining the torso more.
· The first (rearward) grommet is not aligned with the line under tension. It should be moved 2.25" (5.8 cm) forward so it becomes aligned with the riser and the first pulley inside the harness. This would put the grommet at the edge of the front flap of the side access fairing slits, with enough extra material in the rear inner flap to allow for this relocation.
o Update, 2004/12/21: With the new harness I received 2004/12/21, there seems to be better alignment, with less forward pull on the rear grommets. This would confirm the statement from Martin Gostner that the rear pulleys have been relocated further back.
· With the new harness I received 2004/12/21, the forward internal pulleys are placed next to the start of straps going at an angle backwards to hold the back protector. Running the accelerator lines with some tension, there seems to be some rubbing on the start of the straps to the back protector. Maybe it better to rub here than elsewhere, as potential rubbing damaging the back protector straps is probably not critical.
· Accelerator line material.
o With the new harness I received 2004/12/21, came 2 lines heat-sealed at their ends. I got a splinter in my left index while tying knots in them (from the core fiber material?), I hope it won't travel to my brain. No Brummel hooks supplied, but they are cheap and I had spare ones. The line material makes it easy for knots to remain stable as the lines seem to keep the bends you impose. I just hope the sheathing material is not too abrasive for the places where it rubs inside the harness. Time will tell.
· The single center Velcro strap, which can be used to secure the speed bar during launch, can let the bar slip to a side and get one accelerator line in tension during launch. To prevent the slip I installed 2 thick rubber tape and tie-down plastic strap on the bar to prevent the side-slip motion.
Leg straps.
· The height adjustment is made under the seat board. At first it was believed that one needed to adjust them before insertion of the reserve but there is access from the side opening for later adjustments.
o Update, 2004/12/21: With the new harness I received 2004/12/21, I had to adjust the height as the delivery setup was putting the straps just above my knees (I like them higher). Easy to adjust (reserve not installed yet).
· These are top quality. I like the padding, which will probably serve to maintain the original shape of the structural straps, which bucked width-wise on my previous harness. I also like the fact that these leg loops are true loops, not a half loop with ends tied to the seat.
Chest strap.
|
|
|
Click on picture for larger size. Jerome and his evil twin showing the chest strap adjustment range. Chest strap can be made very short (the way I like it) or very wide. |
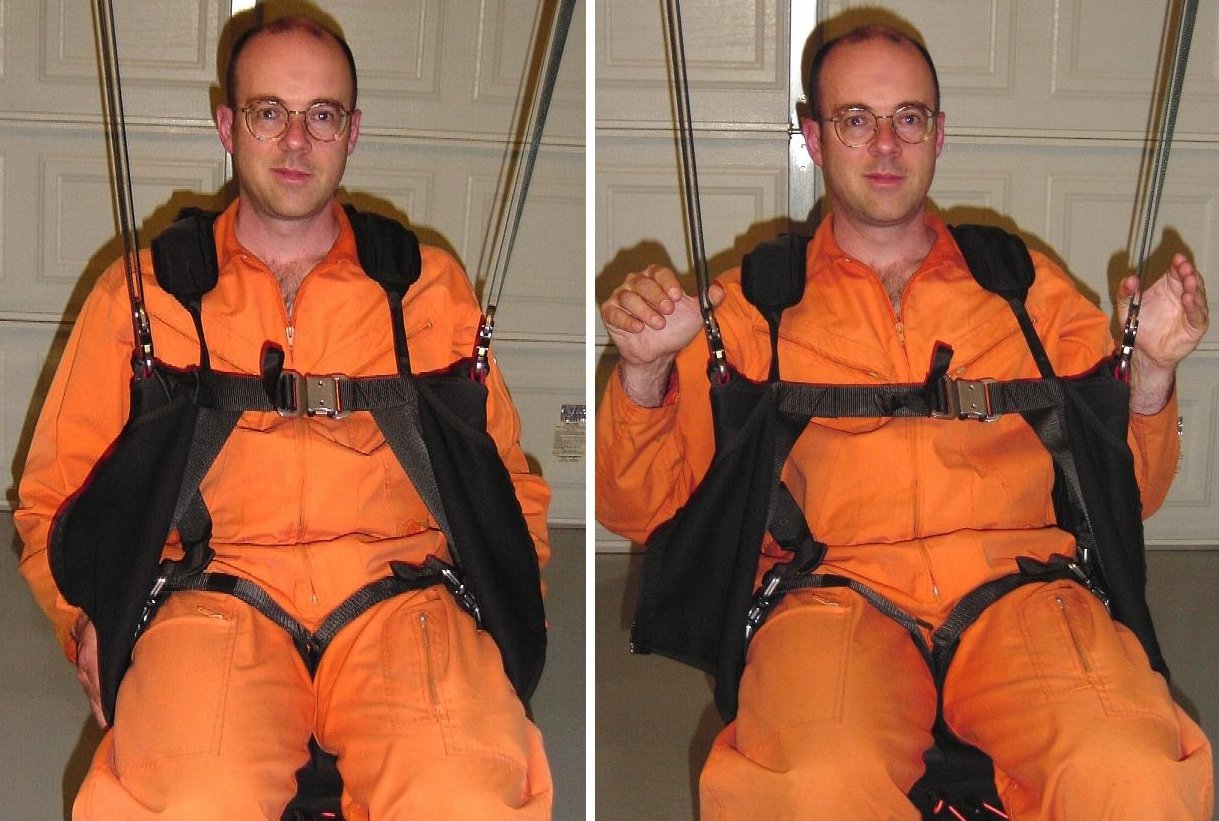
I used a fully shortened chest strap during my flights.
Shoulder straps.
Sufficient adjustment is provided. In flight I was able to make them both too loose and too short, but making them looser in flight best done by using both hands as the straps did not easily slide through the flat plates. Non-issue once adjustment is made.
Harness to riser connection.
I made an attempt to remove a carabiner, to see easy it would be to replace it with quick-links which I prefer. I easily managed to turn the carabiner 90 degree, but after that it seemed like a puzzle to remove it completely because of the small gap remaining when the gate is open, but this is obviously possible since it was installed. Spending a bit more time on this would probably have revealed the trick.
|
|
|
Click on picture for larger size. Steel carabiners were supplied with the harness. |
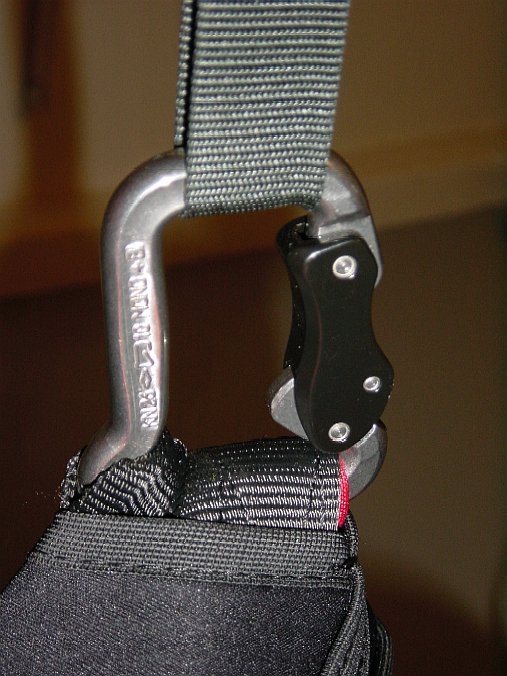
2005/3/10 Update: Due to the recent warning about AustriAlpin / Parafly carabiners, I wanted to make sure this harness was not using that particular model. So I just checked, and it is from AustriAlpin (same company), but the Powerfly model (Stainless Steel). So it's OK - Well, at least for now.
Forward attachment loops.
No shown, but there are seemingly strong loops for either towing attachment, or securing an instrument deck.
Storage.
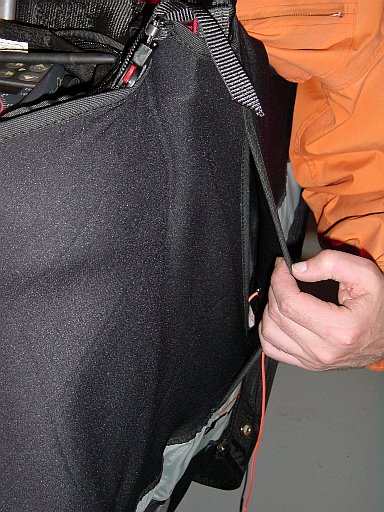
No side pockets. The only storage in located on the harness back pocket inside the rear fairing. For storage accessible in flight, a cockpit became the solution : Its lower container can be accessed through the front fairing side slit.
The speed bar can be stored close to the harness during launch/landing thanks to a single Velcro strap. At first I wasn't sure if one strap would be enough to prevent the bar from slipping to a side, but it could be made snug around the bar and held it well enough during my 3 launches.
To get proper access to the rear back storage compartment, one should unzip both side of the rear fairing, otherwise just unzipping the side for the compartment access, limits access and may force the lower zipper of the fairing.
|
|
|
|
|
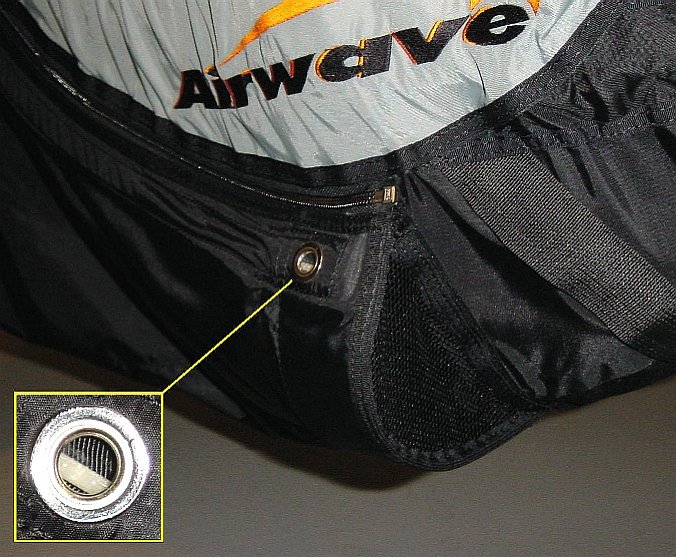
Click on picture for larger size. · One of the ram-air inlets (one on each bottom side). · Composite (Fiberglass ?) battens follow the fairing zipper line and can be seen through the grommet. They seem replaceable through the grommet. · The plastic strips, which hold the opening in shape, seem replaceable because I could access them by separating Velcro. |
Click on picture for larger size. Nice finish on the fairing top zipper. |
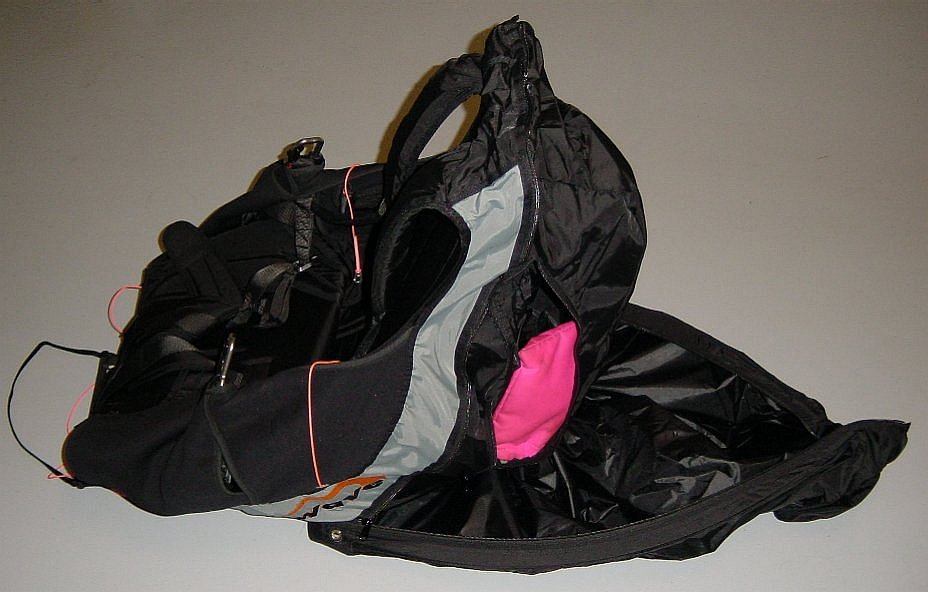
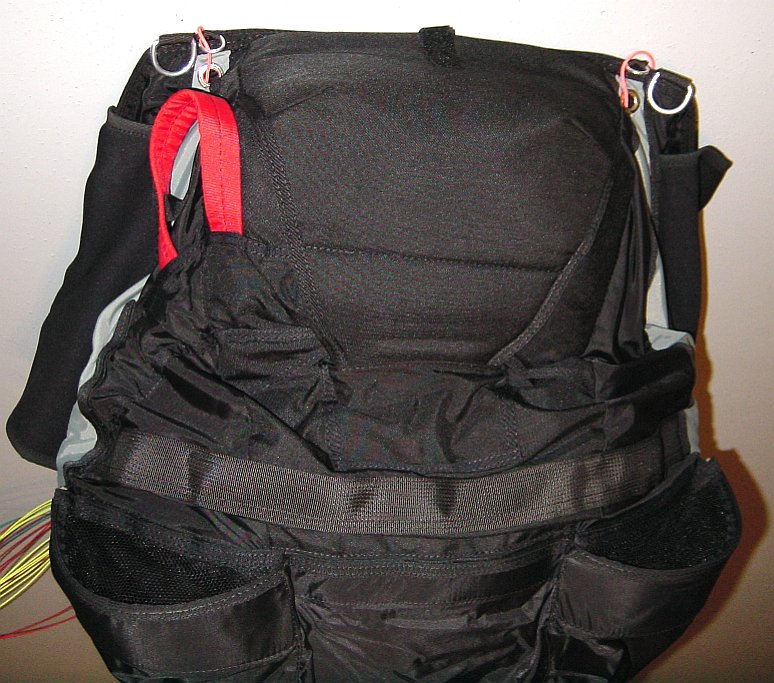
Click on picture for larger size. Pink object shows location of the only storage area, which can be accessed after unzipping the rear fairing. |
I heard fluttering of the fairing at times (about 3% of the time). Difficult to pinpoint, but it suspect the bulge behind the helmet. No big deal, not really an annoyance, more of a curiosity. Another pilot reported the same thing.
In flight, putting my hand to feel the pressure in the fairing revealed a good internal pressure. Pressure felt increased during accelerated flight.
|
|
|
|
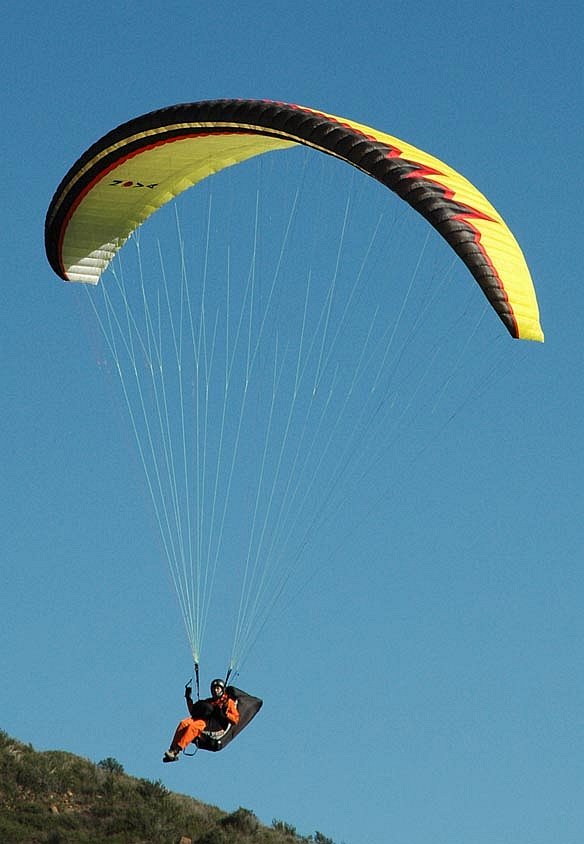
Click on picture for larger size. Picture taken 2005/1/15 by Thomas Soudek at Elsinore. |
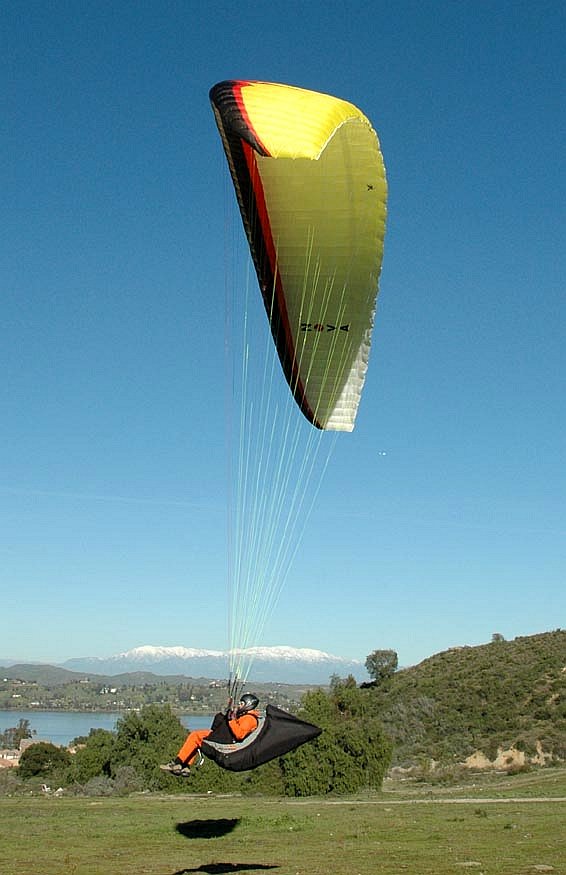
Click on picture for larger size. Picture taken
2005/1/15 by Thomas Soudek at Elsinore. |
Warning: Air intake plastic inserts: I inspected on 2005/8/11 the inserts, which I suspected to be broken/snapped. On one side it was snapped in 2 places, and on the other it was shattered in many. I recommend pilots put tape over these inserts when they are new to prevent shards from moving and causing further damage. I found it easy to replace them with cutouts from a plastic container lid, after plotting their contours. The issue has been sent to Airwave.
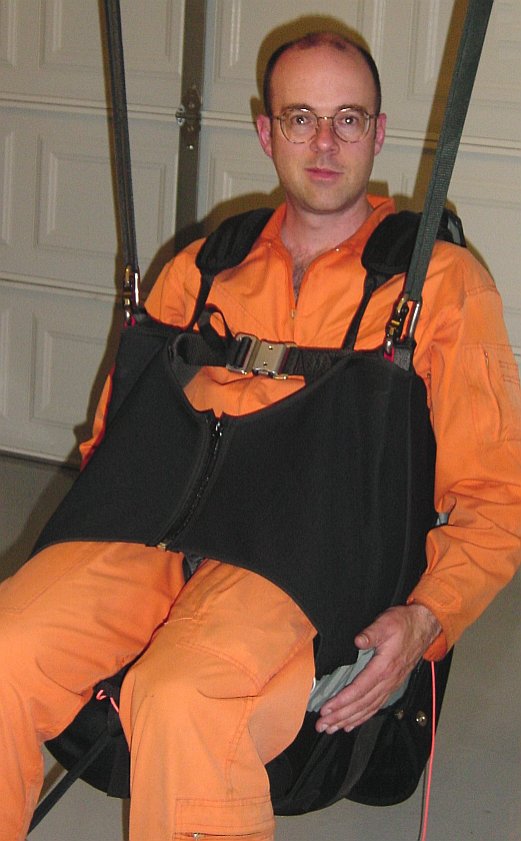
· The Large size seemed to fit me well. It felt snug on the side of the legs, with some room in the chest area (good for winter clothes), but overall fit was good. Assuming the sizes of this harness match those of the GT, the Large (for 175-185 cm pilots) should be my size. I am 178 cm (5'10") tall, when I "stand up straight" (Like my momma used to yell at me).
o Update : Airwave, 2004/5/26 : This would be the correct size for you.
· There is no T-bar leg safety loop. Bruce Goldsmith says he is against this type of device.
· During the 2-hour continuous flight in strong thermal conditions, I felt very relaxed in the harness. I attribute this to a slightly tighter fit than my normal harness, but maybe also from the impression of being enclosed by the front fairing. Maybe the fully shortened chest strap provided more cross bracing than my regular harness (also with fully shortened chest strap). I still had enough feedback from the relative riser movement to decide which side to hunt for thermals.
· Leg loop straps with padding are comfortable during launch and in flight. I appreciate this a lot, when looking back at my current harness loop straps, which have become side-compressed near the seat attachment.
· Good back support by use of a semi-rigid material. Back angle adjustment is made through the use of straps leaving from the carabiners and going to the middle of the lower back.
o Update, 2004/12/21: With the new harness I received 2004/12/21, the loose end of the strap on the left side was caught in the carabiner's Velcro tie-down strip (holds harness loop and back adjustment strap in place). Problem easily corrected by un-doing and resetting the Velcro tie-down strip.
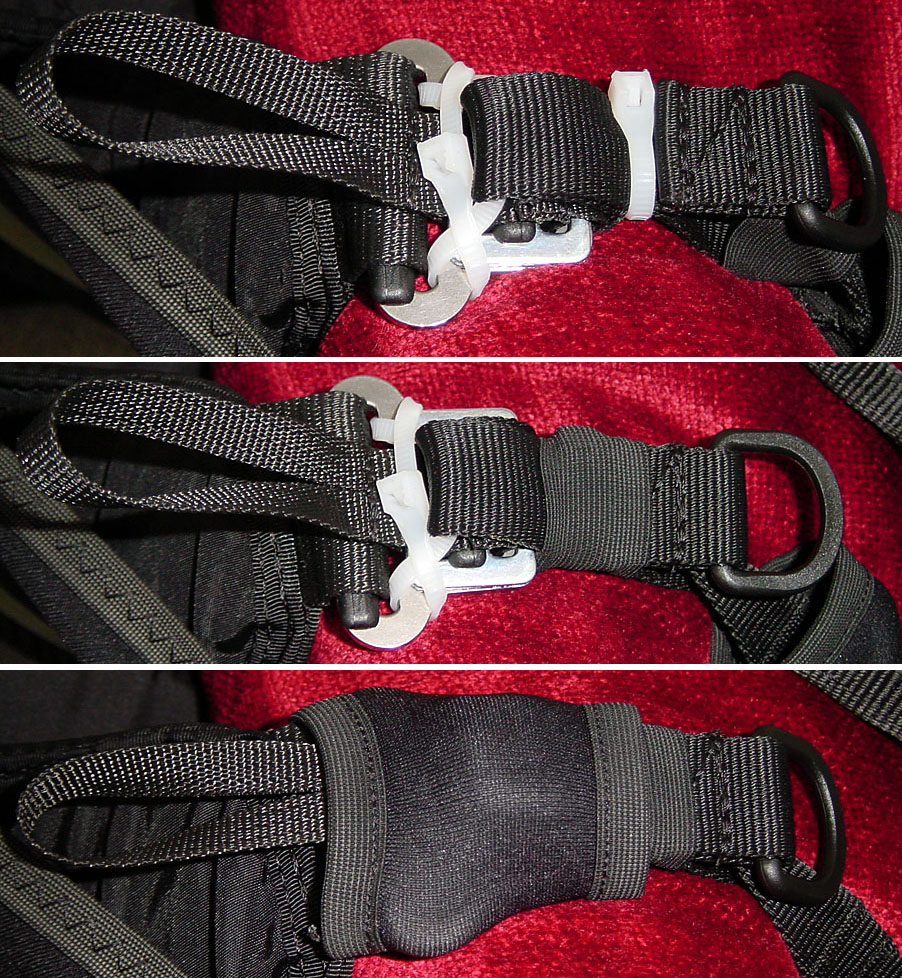
o Update 2005/4/17: Back angle strap buckle fix. Tired of the adjustment buckles allowing strap to lengthen in flight (had to re-adjust 4 times during my 3 hour XC flight yesterday), I made the following fix (makes them non-adjustable). But I wish these adjustment buckles would be replaced by ones like those for riser trimmers, which do not slip (even when unloaded).
|
|
|
Click on picture for larger size. 1.Picture 1. Double-back the loose end of the strap to make a loop. Tie the end before double layer of its end (rightmost white cable tie in upper picture) to the part which will be in tension. 2. Use another cable tie, to prevent loose end of strap from feeding into the buckle. Make sure the head of the cable tie is centered behind the strap so it will not protrude into the neoprene sleeve. 3. Picture 2. Cover the rightmost cable tie with the elastic sleeve, previously designed to hold the end of the strap. 4. Picture 3. Cover the buckle with the neoprene sleeve. |
Slipping back into the harness after launch: Not easy.
o Update, 2004/12/27: With the new harness I received 2004/12/21, there is a small cupping effect from the seat board angle, providing comfort, but only once you are seated properly. After launch, it is difficult to slip back into the harness. Leg strap adjustment height has been shortened to the minimum already, so the harness is lowest possible during launch. To get properly seated I need to push on risers (not letting go of brakes) and squiggle my butt to get 80% comfortable. Later in a smooth part of my flight I then push the seat forward with hands and then achieve a fully comfortable position which remains for the rest of the flight (even with multiple speed bar use). Those using a footrest may avoid this issue (but I avoid stirrups).
o Question to Bruce Goldsmith, 2004/5/19 : What is the highest back angle (closest to vertical), which you think is allowable for this harness ? I was hoping for 15° from vertical, but I'm wondering if that is too "straight up" for the intent of this harness' design and with the potential consequence of improperly orienting the back fairing in the airflow.
§ Answer from Bruce Goldsmith (reprinted with permission), 2004/5/20 : Hi Jerome. This harness is designed as a semi-reclined harness, which is why it is delivered with a stirrup. Some people like to fly like this rather than knees up. It sounds like you don't. It's a matter of personal choice though. You can try to fly the harness knees up, but it is not really intended for that flying style.
o Update : Myself, 2004/5/26 : Spending more time in a static hang test. Using my arm outside the harness to point to my hips, my spotter evaluated my torso angle to be 30° from vertical. Releasing the lower back support straps so the angle became 45°, the seat board also rotated back (my theory: from the rearward weight shift) by about 10°. So it seems that for each 3° one reclined his torso, he gets 2° from the seat board. In this new position I was more comfortable, from the "cupped" effect.
o With the new harness I received 2004/12/21 and flown for 3 hours on 2004/12/25+26, there is a small cupping effect from the seat board angle, providing a comfortable body position. I give a 8/10 rating for comfort (0 would be a painful harness, 5 acceptable, 10 as good as you favorite recliner chair). But see Slipping back into the harness.
· Footrest (stirrup). I don't like to use them in general, but was recommended to use the one supplied with this harness. After achieving comfortable seating position (45° torso angle and seat board titled back about 10°) I added the footrest and felt it provided no added comfort. The only comfortable lower leg angle is to have them dangling (not held up as when speed bar is used) so it just picks up lower leg weight at the soles of one's feet instead of from the back of the knee on the front edge of the seat board. The seating angles did not change from its use. Not worth the extra gear and potential complication to the accelerator setup. One potential advantage is that if the footrest is set very short it may lift up the feet to get them out of the lower airflow, but at a cost to comfort from the raised knees no longer supported by the front of the seat board. Maybe crossing lower legs (I have this habit) does just as well. Another benefit would be for Slipping back into the harness.
o Update, 2004/12/21: With the new harness I received 2004/12/21, I removed this item by unthreading the adjustable straps. For those who use it, I am concerned with the internal friction felt when extending the elastic strap. Is the internal elastic getting worn down by a sharp edge of the stirrup bar?
· According to another pilot, the seat board is sewn in and cannot be easily replaced. A non-issue in my view.
|
|
|
Click on picture for larger size. Seating area. |
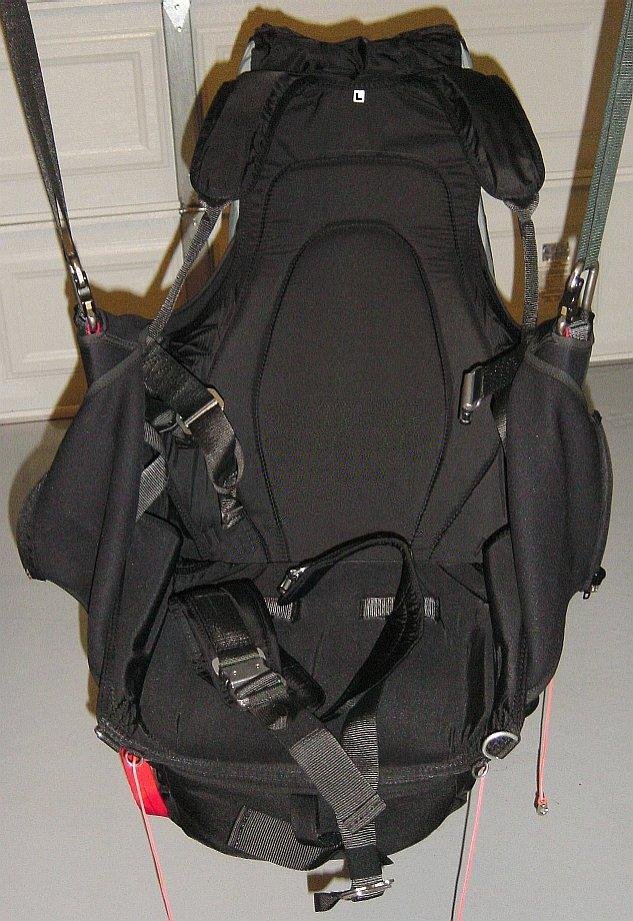
Back protection.
The thickness of the removable bottom part of the protection is 15 cm (6"). No sure who is the supplier of this protector but it seemed well finished with a tight outer skin.
The lower part of the back protection is detachable thanks to Velcro on its sides. A built-in girdle seems adapted to handle a water ballast bag.
Update, 2004/12/21: See note in "Accelerator system" section about the accelerator line rubbing on the straps, which hold the back protection in place.
· Requirements:
o Huge main compartment, tapered design.
o No straps running over the harness air inlets.
o Additional storage space for helmet.
o Bag can be very simple as I avoid hiking, so I do not need a waist belt, shoulder belts are enough.
o Folds into a small package for storage into the harness during flight.
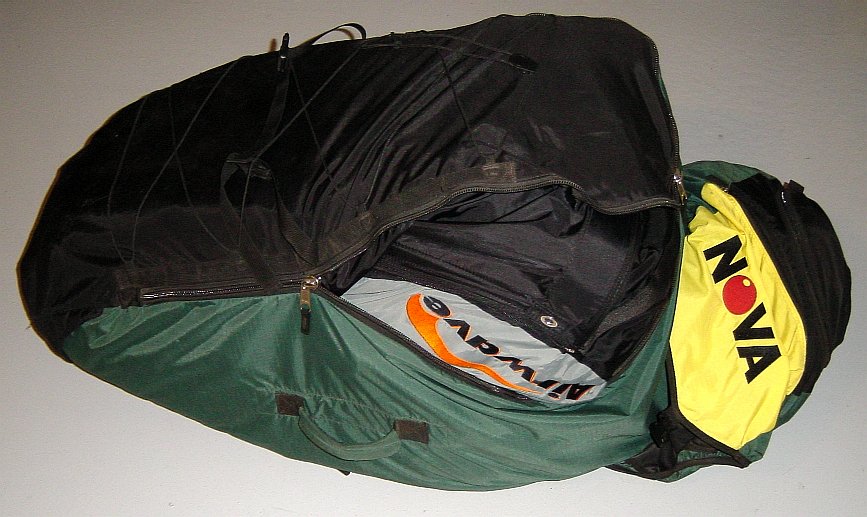
· Nova (regular size, 2002 model). Too small:
|
|
|
Click on picture for larger size. · It is too tight in the wrong places: o Wing + harness make for a very tight fit, crushing the ram-air inlets. Although the plastic inserts, which maintain the opening shape, seem to have tolerated the abuse during a 13 hour time period. o The bag's hood tie-down straps act directly over the ram-air inlets, crushing them even more. o Bag dimensions : 180 cm (71") maximum circumference (near the top, or right of above picture) and 85 cm length of main compartment. · Because the reserve is mounted on the bottom of the harness, and the harness is bottom-up in this transport bag, it becomes top heavy (non-issue). |
· Sky Paragliders / Porter. A good solution:
o Despite the same maximum circumference as the Nova bag (180 cm, 71"), the wing and harness fits without compressing the ram air inlets. Possible explanation: The extra length (about 90 cm) of the compartment allows the harness seat to open more.
o Good: Hood tie-down strap is single and centered, avoid the harness' ram air inlets
o Good: The helmet fits in the hood's compartment so it does not need to be with the wing and harness. But it is a tight insertion through the zipper opening when wing and harness are in place.
o Good: Lots of cinch straps (maybe I will cut them off to save bulk). 2 extra lower small zipper pockets.
o Bad: Tough/thick fabric making it somewhat bulky for storage in the harness, but not a real problem either.
o Bad: Waist strap is not removable (I may un-sow or cut it off).
o Bad: Hood main tie-down strap is at end of its range, and should be a bit longer.
Landing.
|
|
|
Click on picture for larger size. Underside of the harness. |
I had 3 good
landings but the question arises : What if one does a butt-slide landing with
this ? Of course, this harness not being
intended for beginner pilots, but here are my though in the event that it does happen :
- The largest reserve flap/tab seems
robust and well designed to protect it and keep the dirt out.
- Those ram air opening could take a
beating.
- Worst case scenario is that repairs
would be needed, but the air inlets are part of the detachable rear
fairing, so one could still fly his harness during repair time, only
sacrificing the reduced aerodynamic drag, and suffer question from others
like "Where is your fairing dude ?".
Performance
Enhancement.
Thermik Magazine, May 2004 :
·
From
Airwave's news page… Last week Thermik (formerly known as Gleitschirm) Magazine did a series of tests on
the Airwave Ram race harness. They took 2 identical DHV1-2 gliders of the same
size with pilots the same weight. One pilot had a conventional paragliding
harness and the other the Ram Race. The two pilots made a series of glide tests
side by side to try to measure any performance difference coming from the
harness. They found there was a clear
gain in performance by the pilot flying the Ram Race. The 2 pilots switched
harness as well and the result was repeatable. The calculations of the height
difference showed that the pilot with the Ram Race gained 0.3 of one point of
glide over the other pilot with a normal harness. We would expect the glide
improvement would be greater on a higher performance wing.
·
They
used two Artax M to compare the Ram Race against a standard harness. Standard harness: 8.4 ;
Ram Race harness: 8.69 . à 0.29 improvement.
Breaking
the 9:1 L/D barrier.
- This was my first time, where I
broke through the 9:1 Lift/Drag barrier.
My current wing (Aeron) was measured by Vol
Libre (June 2003 issue) to have 8.87, so adding
the 0.29 measured by Thermik Magazine, this combination would now
produce 9.16, clearly over 9:1 . Amazing that it can be achieved with
equipment accessible to a significant percentage of pilots (dampened DHV 2
wing).
- I was asked :
"Is the improvement in glide noticeable ?". To which I respond :
Not by a seat-of-the-pants feeling, although a few times I was left
wondering if my glides were not a bit better than usual. My guess is that
there need to be something like 0.75 L/D improvement for it to become
obvious without instrument measurements. What do you think
?
- Is a 0.29 improvement in L/D worth it ? I think it
can make the difference in going up from a low save, giving you a
better-formed thermal, a small height over where you would otherwise have
caught it. And who knows, maybe it will make the needed difference for
crossing a ridge that would have otherwise trapped you into a valley.
1. Design (In order or priority).
a. Very annoying: Facilitate slipping back into the harness after
launch (without using a footrest/stirrup). I recommend a system to lift the
front edge of the seat as on a Sup'Air / Profeel XC 2.
b. Annoying: No speedbar retraction system, so the speedbar
is snug against the harness while launching and landing. What is needed is
something that does not rely on riser tension, so the speedbar is retracted
when walking with the bundled wing. A good system is the one used on the Sup'Air
/ Profeel XC 2, using an internal elastic line.
c. Moderate annoyance: Prevent back angle strap adjustment
buckles from slipping when not under tension. See Back angle strap buckle fix.
d. Moderate annoyance: More robust Air intake plastic inserts
(related comments).
e. Minor: Prevent speed bar sideslip motion while held by center
Velcro strap. See comment in Accelerator system.
f.
Minor: Reserve straps that leave the shoulder
should not be structurally bound, but made removable as some parachutes already
contain these long straps, and those part of the harness have to be cut
away. See removable straps on a Sup'Air
/ Profeel XC 2.
g. Almost a non-issue. Reduce friction of the accelerator
lines during activation.
2. Instructions. Until the English manual is available, just
provide a page stating …
a. The recommended torso recline angle.
b. How to install the reserve: Mention how
the reserve handle strap should be attached to the parachute's diaper to
facilitate extraction.
The performance claim of a 0.29
Lift/Drag enhancement is assumed, but not verified here.
|
Potential drawback |
The recreational pilot will
say… |
The XC/Comp pilot will
say… |
|
Absence of a T-bar safety leg
strap. |
If I forget this, I will have
to use this tip: You
Forgot to Fasten your Leg Straps. |
Just pay attention and have a
good pre-flight routine. |
|
No built-in in-flight storage. |
I was hoping not to have to
resort to a cockpit. |
I already have a cockpit. Good riddance with those drag-inducing side
pockets. You will need one anyway for
your multiple electronic items. |
|
Recommended semi-reclined back
position. |
I like to have my torso at 25° from vertical for a feeling of control
and reduced risk of riser twist. |
A straight-up torso can't be
good for aerodynamics. A semi-reclined
torso is a decent compromise. |
|
Potential abuse of reserve and
ram air inlets during butt-landings. |
This harness may be too
fragile for me. |
How many landings do you do in
a day? My harness bottom still looks
good. |
|
The big rear fairing. |
Will people point at me? |
Lightweight and aerodynamic,
this is the future. |
As for myself…
Although a recreational pilot, I always long for more performance,
searching for a good compromise in a wing's resistance to collapse and
available performance. Changing to this
harness should not significantly impact my safety, only causing some
re-adjustment to my habits and gear to accommodate its design (above
table). That adaptation would be
outweighed by the performance gain. Just
like a new car model, its first year will reveal some fabrication issue but
these should all be simple and quick to resolve.
Update, 2004/12/22: Believing that my previous
modification requests were met… Using the cheapest delivery method, it took 32
days to receive my harness (in California) ordered on 2004/11/19. Improvements over the previous design:
·
Angle
of the seat plate has been changed so that we are more comfortably seated:
Cupping effect, with your butt lower into the harness.
·
Zigzag
stitching on bottom edges of the front neoprene fairing, instead of straight
stitching.
·
Relocation
of rear accelerator line pulley, so the 1st grommet is better aligned.
·
Longer
chest strap (not verified, but I am told).
·
Modification
to the reserve system making it easier to get the reserve out. See Reserve
parachute setup.
·
Better
accelerator pulleys (verified based on memory of the original ones).
Update, 2005/8/12:
·
Updated
my wish list based on my experiences so far.
·
I
switched to flying another harness on 2005/7/28, mainly for the reason of
getting seated more easily after launch (without relying on a footrest). I remain interested in the use of rear
fairings, and will keep an eye on the evolution of this harness' design.
Update,
2007/2/22:
·
Waiting
on manufacturers to offer an open-leg harness with rear fairing and not rely on
a foot rest: Discussion
on ParaglidingForum.
|
If you enjoyed reading this review, please make a donation
to encourage me to write future reviews. |