Back to Motorcycle.
Center Stand for a Honda CTX700/CTX700D/CTX700N/CTX700ND
Using one made for a Honda NC700S
|
1. Main 2. Conclusion |
by Jérôme Daoust. Revised 2017/3/16 |
Main (Top of Page)
Items purchased ------------------------------
From Webike (must use PayPal):
Center stand, part # 08M70-MGS-J10 (do NOT get the one ending with 30)
http://japan.webike.net/products/20891360.html
It is designed for the NC700S. Dimensions:
9.25" from the center of the shaft to the base of the feet.
10.75" from top of stand to base of feet.
Install instructions (source).
Stand stopper, part # 35-21-01
http://japan.webike.net/products/20531216.html
It is designed for the NC700S, NC700X, NC750S, NC750X.
Related pictures of my installation:
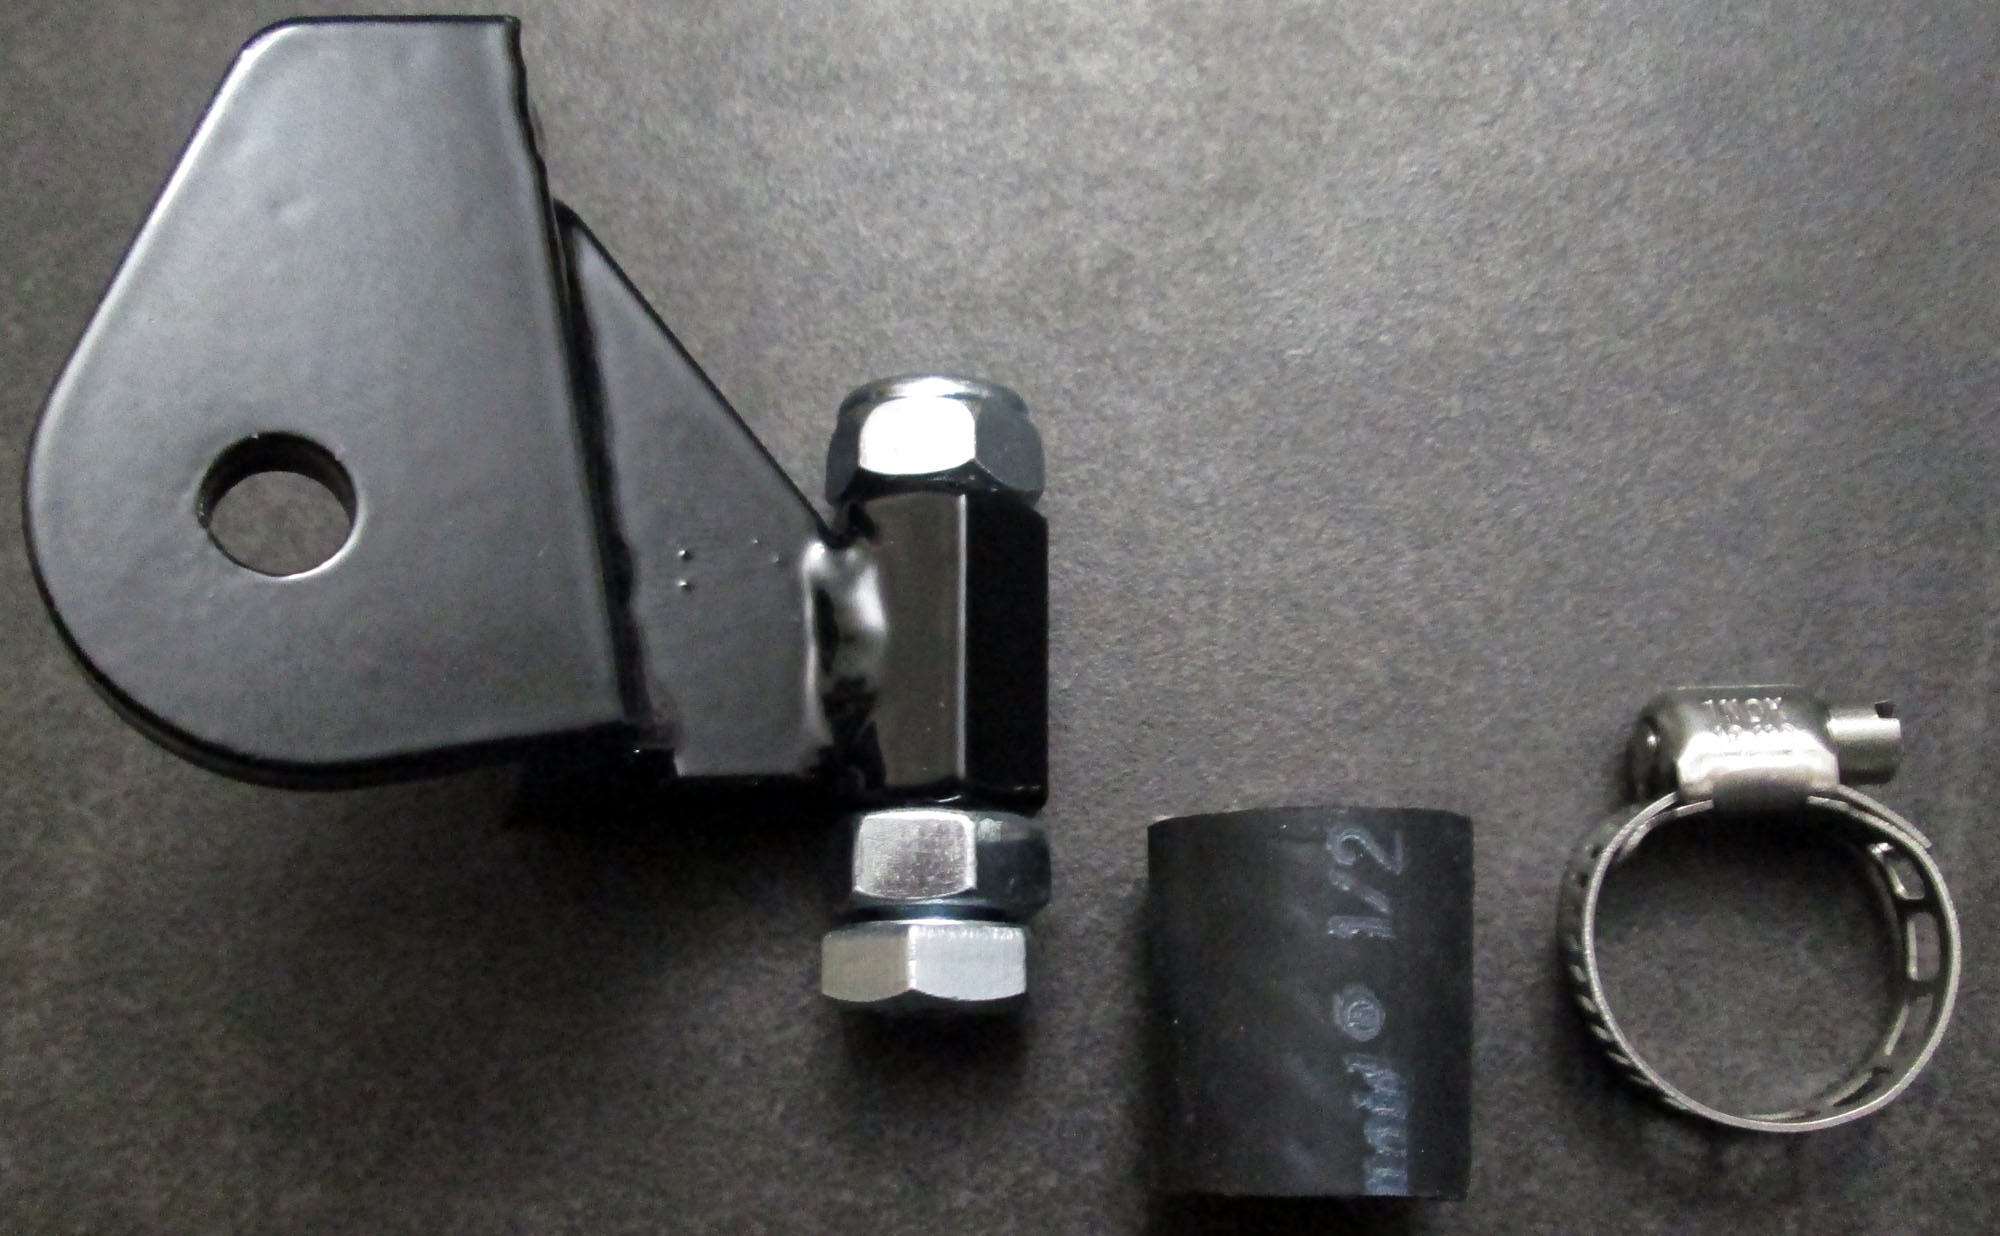
Picture of adjuster bolt and lock nuts + hose + clamp (separate).
Picture of adjuster bolt and lock nuts + hose + clamp (assembled).
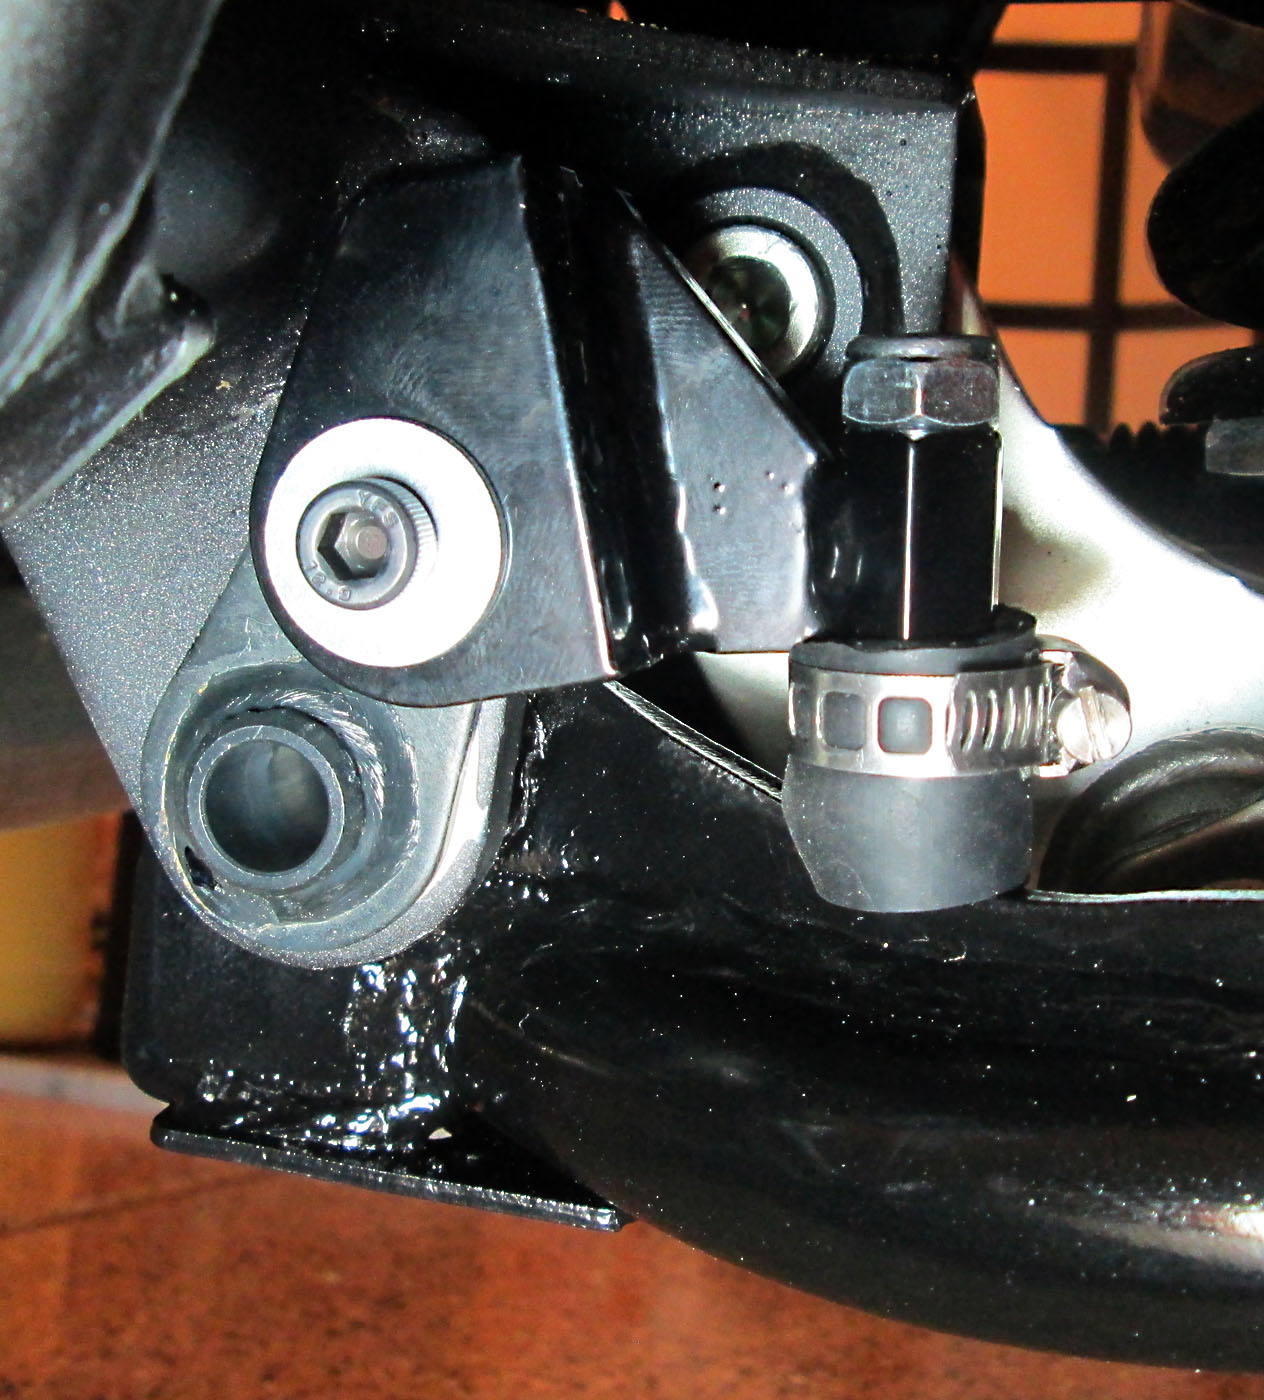
Picture of stopper in place, with option SA1.
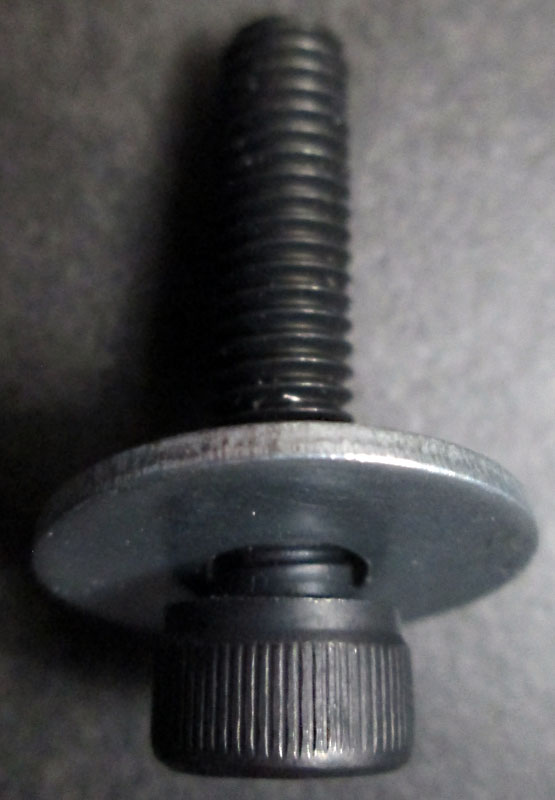
Socket bolt upgrade:
Class 12.9, 6 mm, 1.0 mm pitch, 25 mm thread length. Picture of bolt + washer.
Specifications from Bolt Depot
Proof load higher than supplied one, marked 10.9: Reference.
Flat washer:
For the 6 mm socket bolt clamping stopper bracket to frame.
Purpose: Replaces split lock washer.
Loctite will do job of securing bolt, non-split (and larger OD) washer distributes load better.
1/8" ID (5/32" measured), 3/4" OD. Ideal OD, but needed to increase ID:
Used drill with 7/32" bit, then reamed hole until 6 mm bolt fit inside.
Optional (see SA1), recommended to absorb impact of returning stand onto stopper bolt:
Picture of adjuster bolt and lock nuts + hose + clamp (separate).
Picture of adjuster bolt and lock nuts + hose + clamp (assembled).
Black heater hose by Thermoid, 1/2" (12.7 mm) ID, 0.81" OD (20.6 mm), 1' length for $1.59 at True Value:
Hose clamp for black heater hose.
5/16" to 7/8" (8-22 mm) diameter, 5/16" W, S/S (Stainless Steel) Worm Drive Clamp.
Optional (see AB1):
Longer stopper adjuster bolt (original is 30 mm thread length):
Class 8.8, 8 mm, 1.25 mm pitch, 35 mm thread length.
Hex lock nut with Nylon insert, 8 mm, 1.25 mm pitch:
Specifications from Bolt Depot.
Use: Prevents losing stopper adjuster bolt.
Tools needed ------------------------------
Loctite Blue 242 Threadlocker. Note: Do NOT use the "red"/Permanent.
Available at Amazon for $5.56
Substitute:
HFT Threadlock No. 42. Medium Strength. Item 65192. 0.33 oz (10 ml).
Available at Harbor Freight for $1.99. SKU 65192.
Will be used for:
Spring hook/bolt.
Socket bolt, clamping stopper bracket to frame.
Axle grease, for the stand's shaft.
Spring puller, either:
For option SP1 (best/easy): Spring hook: Example:
ABN Brake Spring Hook Headlight Adjusting Tool.
Available at Amazon $6.99.
For option SP2: Ratcheting tie down strap. Example:
Harbor Freight / Haul-Master, 500 lb. Capacity.
Available at Harbor Freight $4.49 + Tax.
For option SP3: Home-made cord loop with handle.
Torque wrench:
To set these values...
15 ft-lb for muffler band bolts. p2-19 of service manual.
16 ft-lb for spring hook/bolt. Shown in instructions, page 1.
9 ft-lb for socket bolt. Shown in instructions, page 1.
7 ft-lb for muffler cover socket bolt. p2-19 of service manual.
7 ft-lb for left rear under cover socket bolts (assuming 6mm). p1-12 of service manual.
I got:
Pittsburg Pro / Click Type Torque Wrench / 1/4" Drive.
Available at Harbor Freight, I Paid $10 during a sale.
Torque range: 20-200 in-lb (1.7-16.7 ft-lb)
12 mm socket, with 1/4" drive (not larger): To tighten:
Spring hook/bolt.
Need the 1/4" drive instead of 3/8" for a 1/4" extension to clear muffler pipe.
Better than a wrench, which would not be able to set proper bolt torque.
Muffler band bolts. Drive size not an issue here.
5 mm socket hex bit, extra-long. To use for:
Muffler cover bolt.
Bolts for left rear under cover.
Socket bolt that holds stand stopper to frame. Here we need the extra length.
I used this set, which has 3-1/4" (83 mm) length bit beyond the socket:
Neiko 10076A 3/8-Inch Extra Long Metric Hex Bit Socket Set, 7-Piece.
Available at Amazon for $14.
Installation procedure ------------------------------
Install rubber stop on center stand, by first wetting the rubber nipple.
When fully inserted, it should be easy to turn the rubber stop.
Take off muffler cover (part #5), by removing the bolt (part #19). Use a 5 mm hex bit.
Do not loose either of the 3 rubber inserts: One in cover where bolt is (part #6),
2 at ends of tabs that insert into rear slots (part #3).
Rotate muffler band bolts:
Use 12 mm socket to completely remove (not just loosen) muffler band bolts (part #8).
Pry open muffler band to rotate the bolt heads (part #18) to the bottom and click into next notch.
Concept: Have nothing protruding on inside of exhaust pipe to interfere with springs.
Tighten muffler band bolts.
No Loctite here. Torque to 15 ft-lb (180 in-lb).
Option LCR (Left Cover Removal): Recommended, for easier access:
Remove the "left rear under cover" (part #4) held by 2 bolts (part #9). Use a 5 mm hex bit.
Install center stand shaft:
Grease both the inside of stand shaft tube ends and the shaft thicker ends.
Align the center stand shaft tube with frame's mounts holes.
Slide shaft until it is flush and cannot go further.
Temporarily use the short 6 mm socket bolt (hand tighten) to avoid shaft sliding out.
Install spring hook/bolt into threaded hole above stand axle on right side of bike.
Use 1 drop of blue (medium strength) Loctite, at start of thread, spread it.
Use 12 mm socket with 1/4" drive and 1/4" dive extension to barely clear exhaust pipe.
Torque to 16 ft-lb (192 in-lb).
Install springs:
Slide small spring into center and inside of big spring.
Note: Wider diameter end of springs are away from the spring hook/bolt just installed.
Advice: Since smaller diameter spring seems to have less pulling force, connect that one
to the outside on the spring hook/bolt, to reduce bending moment on that part.
Select an SP (Spring Puller) option to install springs:
SP1 (best/easy): Use spring hook to stretch springs onto loop of stand.
Your motorcycle should be using the parking brake (DCT) or 1st gear.
Do one at the time, starting with smaller diameter one.
SP2: Use a ratcheting tie down strap, attached to rear of swing arm (protect with cloth).
SP3: Use a home-made cord loop with handle. Used same way as option SP1.
SP4: Install springs before securing right side of stand with its shaft.
Use stand as leverage to extend springs while inserting shaft all the way.
This method is least favorite as stand shaft may get damaged/scraped.
Stopper bracket assembly:
Secure the bracket to the frame:
Remove the temporary bolt (that came with stopper bracket) holding the shaft end.
Use the 6 mm class 12.9 socket bolt, instead of the class 10.9 purchased with stopper bracket.
Use the 3/4" OD flat washer (with ID increased to fit 6 mm bolt), instead of split lock washer.
Make sure bracket is rotated counter-clockwise to be blocked against frame.
Use 1 drop of blue (medium strength) Loctite on the socket bolt, at start of thread, spread it.
Use 5 mm socket hex bit. Specs say to torque to 9 ft-lb (108 in-lb),
but since this bolt will be solicited in bending from impacts of returning stand,
a low-tensioned bolt would be more vulnerable to bending. Torque it to 10 ft-lb (120 in-lb).
Install rubber SA (Shock Absorber) to absorb impact from stand returning to riding position:
Option SA1: Heater hose: Pick AB (Adjuster Bolt) option:
Picture of adjuster bolt and lock nuts + hose + clamp (separate).
Picture of adjuster bolt and lock nuts + hose + clamp (assembled).
Option AB1, best: Use longer 35 mm long 8 mm bolt.
This will provide extra length to add a lock nut with Nylon insert at upper protruding end.
Option AB2: Use original 30 mm long 8 mm bolt.
Use lock nut on same side as head, underneath the stopper bracket.
Since cannot use a torque wrench, tighten to reasonable value.
If chose option AB1 above:
Above bracket, use Hex lock nut with Nylon insert at top of protruding bold threads.
No Loctite here. Light torque, about 4-5 ft-lb. Purpose: Not lose the bolt.
Cut a short length (longer than distance from bottom of bolt head to bracket)
of black heater hose, insert over head of both the bolt head and lock-nut,
underneath the stopper bracket.
Trim bottom of hose, to adjust center stand resting position:
With swingarm at lowest, ensure 1" clearance between chain and stand.
Tighten a hose clamp around hose at highest location (away from contact with stand),
to secure hose while allowing flexibility in the bottom part (past bolt head).
Picture of stopper in place, with option SA1.
If chose option LCR: Put back "left rear under cover" (part #4). Use a 5 mm hex bit.
No Loctite here. Torque to 7 ft-lb (84 in-lb).
Put back muffler cover (part #5). Use a 5 mm hex bit.
First insert the 2 rear tabs, hopefully still covered with rubber (part #3), into the slots
on the muffler. Verify both tabs inserted by trying to rotate cover about muffler axis.
Insert the bolt (part #19) through the rubber grommet (part #6) (to avoid crushing it later).
No Loctite here. Torque to 7 ft-lb (84 in-lb).
Verify clearances:
With stand in riding position:
There should be no cornering clearance issue, footpeg base should hit before.
Stand is far enough (2+”) from chain.
Leave your motorcycle alone for 24 hours.
Do not try to raise the motorcycle onto its new center stand right away.
You want the Loctite to set, before the bolt holding the stopper bracket gets
impacted by a returning stand.
In 24 hours:
Try the new stand. Proper technique to lift (video demonstration):
Stand on left side of bike. Left hand on left handlebar grip.
Right foot deploys center stand so both its feet contact the ground.
Right hand gripping passenger foot peg.
In one motion to raise motorcycle:
Put all your body weight onto the stand's extension, with right foot.
Pull up on passenger left foot peg.
Verify clearance between stand and exhaust pipe when stand is in use.
Verify that stand stopper's shock absorber is functional:
Straddle the motorcycle, still on its center stand.
Rock motorcycle forward and off its stand, by pushing handlebar.
You should not hear a metallic "clang" but a dull impact when stand returns.
I wish there was an existing aftermarket stand stopper with a well-oriented shock absorber.
A center stand will facilitate chain maintenance, tire replacement/repair.
Related discussion: CTX700 Forum > Center Stand for the CTX700.